Hey guys and girls, I figured at least a few of you out there may like to watch the progress I make as I restore this car. There is a very, very long story that goes with this car, but I'll keep it short and give you some background on it. My dad bartered one of his 80's chevy trucks for this car when I was pretty young (he bought it for me so he could restore it and give it to me after I graduated high school). If i remember correctly i was probably about 5 years old (I'm 21 now). It was a running driving car with only 57,000 original miles... The issue was that the original owner was an older gentleman and he literally hit EVERYTHING but the lottery; the car had a minimum of one dent on every body panel, and not just little dents. We drove the car for about a year or so as it was and then my dad decided it was time to restore it.
The car was driven into one of my dad's good friends garage (an amazing body guy) and the car was completely disassembled. Slowly all of the body got done after endless hours he had to spent to save all of the original panels. Unfortunately my dads good friend died suddenly just after all of the body work was done, and the car had to be moved. We took the body, frame, and what we thought were all the parts and moved it all to where the car sits today. That was probably about 10 or 12 years ago now. Ever since the day we moved the car in here it wasn't touched again. My dad ran out of time to be down working on it, but over the years when he had the money he'd order parts he knew he needed for the restoration. I always wanted to finish this car but never had the motivation because of the sole fact that I didn't take it apart; I learn by taking things apart and putting them back together, not by getting handed a pile of parts and putting together someone elses unorganized pile of parts.
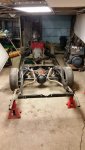
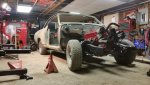
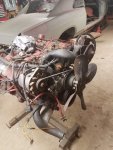
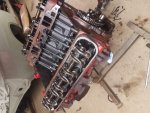
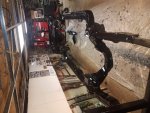
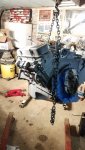
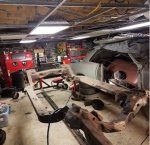
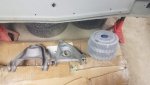
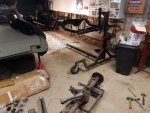
One day about a month ago I went down to my dads shop to grab a tool I needed and looked at the car sitting there, and something dawned on me. Well that night I started from where my dad left off. Since that night I have completely stripped the engine (to inspect and re-gasket), completely stripped the frame, cleaned, de-greased and painted the frame, spent over 25 hours sitting behind the sand blast cabinet sandblasting chassis parts, ordered a ton of parts and supplies I knew i was going to need, and spent hours sorting through most of the boxes of parts that were unorganized.
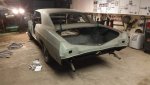
This is a fully numbers matching car, I am keeping it 95% original. Obviously frame paint is not the correct color (only because I personally like the gloss black look), but everything else from the original body color, interior, engine, and the rest of the chassis will be correct.
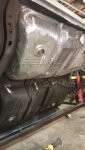
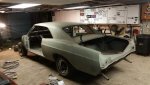
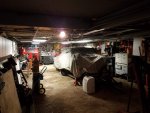
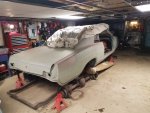
There are a few pictures attached of my progress so far and it will continue to progress as i have literally been working on this car EVERY night since the first day I started.
The car was driven into one of my dad's good friends garage (an amazing body guy) and the car was completely disassembled. Slowly all of the body got done after endless hours he had to spent to save all of the original panels. Unfortunately my dads good friend died suddenly just after all of the body work was done, and the car had to be moved. We took the body, frame, and what we thought were all the parts and moved it all to where the car sits today. That was probably about 10 or 12 years ago now. Ever since the day we moved the car in here it wasn't touched again. My dad ran out of time to be down working on it, but over the years when he had the money he'd order parts he knew he needed for the restoration. I always wanted to finish this car but never had the motivation because of the sole fact that I didn't take it apart; I learn by taking things apart and putting them back together, not by getting handed a pile of parts and putting together someone elses unorganized pile of parts.
One day about a month ago I went down to my dads shop to grab a tool I needed and looked at the car sitting there, and something dawned on me. Well that night I started from where my dad left off. Since that night I have completely stripped the engine (to inspect and re-gasket), completely stripped the frame, cleaned, de-greased and painted the frame, spent over 25 hours sitting behind the sand blast cabinet sandblasting chassis parts, ordered a ton of parts and supplies I knew i was going to need, and spent hours sorting through most of the boxes of parts that were unorganized.
This is a fully numbers matching car, I am keeping it 95% original. Obviously frame paint is not the correct color (only because I personally like the gloss black look), but everything else from the original body color, interior, engine, and the rest of the chassis will be correct.
There are a few pictures attached of my progress so far and it will continue to progress as i have literally been working on this car EVERY night since the first day I started.
Attachments
-
 20170127_002808.jpg111.3 KB · Views: 48
 -
 20170129_233219.jpg112.3 KB · Views: 51
 -
 20170130_203008.jpg116.5 KB · Views: 56
 -
 20170201_220008.jpg126.7 KB · Views: 61
 -
 20170207_182942.jpg142.7 KB · Views: 53
 -
 20170213_213743.jpg110.2 KB · Views: 55
 -
 20170204_204914.jpg116.9 KB · Views: 49
 -
 20170215_230208.jpg70.7 KB · Views: 51
 -
 20170207_234950.jpg126.4 KB · Views: 64